Understanding the Basics of Plumbing
Plumbing is an essential part of any construction project. It provides access to clean water, facilitates safe drainage and sewage management, and ensures comfortable heating and cooling. For more information, click the link https://hubbardmechanical.com/ provided to proceed.
It’s also a highly flexible career that offers freedom and independence. Many plumbers choose to start their own companies to have control over work schedules, client relationships, and profits.
Valves are a key component to any plumbing system, as they control the flow and pressure of fluids within the pipes. They come in a variety of styles, each designed for a specific purpose. Valves can be found in both household and industrial settings, and are used to change the direction of fluid flow or to shut off water entirely in an emergency. Choosing the right valves for your system is essential, as high-quality valves will not only perform properly but also last long.
There are many different types of valves, each with a unique function. For example, gate valves are designed to open and close quickly and can be operated by hand or with automated controls. Ball valves have a handle that turns a circular “plug” inside, allowing or blocking the flow of water depending on its position. These are ideal for shutoff applications because they are easy to operate.
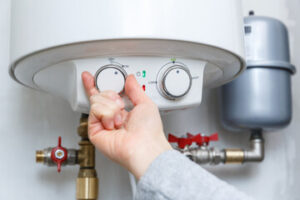
Another type of valve is a globe valve, which is often used in irrigation systems. These allow farmers to control the amount of water that is being sent to each plant, improving yields and preventing plants from becoming over-watered. Globe valves are also commonly found in the water heaters of homes, as they regulate the amount of water that is being fed to the heater and help ensure that it operates correctly.
Disc valves are a necessary part of many underground plumbing applications, as they are designed to withstand the high pressures and temperatures that can occur in these environments. The main part of a disc valve is the seat, which is designed to withstand the high pressures of liquid flowing through it. The seat is typically made of a durable material, such as metal or plastic, that can withstand the pressure of liquid passing through it.
The type of pipe connection will determine what kind of valve is needed. Threaded valve connections are common, as they are easy to connect and maintain. However, a tapered or push-to-connect valve may be more suitable for certain applications. This is because a special O-ring around the valve port that is smaller than the outside diameter of the connecting pipe gets stretched and compressed between it and the valve body, while a grab-ring with teeth digs into the pipe and holds it in place.
While gravity sewer lines slope downhill to transport wastewater to area treatment plants, there are occasions when these lines encounter obstacles that prevent them from reaching their destination. In these cases, a pressurized system known as a force main can be used to propel sewage uphill.
These pipelines are fitted with pumps located in lift stations to create the necessary pressure that drives wastewater to higher elevations. They are typically found in areas that cannot support a gravity sewer system due to the topography of a region.
Like other pipes, force mains are susceptible to the same types of failures as other parts of a wastewater system, including clogs and breaks. They are also subject to fatigue from repeated pumping operations. This is why it is critical to identify the conditions of these pipelines with the right tools and techniques.
The good news is that identifying and addressing the issues with a force main are easier and more cost-effective than ever. The use of advanced technology, such as smart-ball testing, allows MSD to collect data that targets localized threats and makes it possible for staff to repair and rehabilitate pipelines before they fail. This helps reduce high consequence failures and increases reliability.
Unlike other pipelines that are primarily made from iron, these pipes are often made of polyvinyl chloride (PVC) and other materials that do not have the same corrosive properties as iron. As a result, their life expectancy is much shorter than their iron counterparts.
Despite their shorter lifespan, however, force mains are still an important part of the wastewater infrastructure. They help ensure that wastewater gets where it needs to go and provide safe, sustainable service to residents and businesses. That’s why it is critical to understand the conditions of these pipes and implement the appropriate monitoring and inspection strategies to protect them.
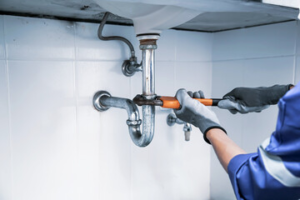
Behind your walls and under the floors of your home, there’s a system that brings in fresh water and disposes of wastewater. That system is your sewer line and it’s not immune from damage, clogs, and other issues that can require serious repair or replacement. By understanding what your home’s plumbing system consists of and how it works, you can better protect it and understand when it’s time to call a professional.
The first thing to understand is the difference between a drain line and a sewer line. A clogged drain line will usually appear in the lowest parts of your home, such as toilets and showers, while a broken or clogged sewer line will show up in your yard, possibly even in your street. You’ll also know if you have a problem with your main line by the distinct smell of sewage.
A clogged sewer line can have far-reaching effects because it affects every fixture in your house. A plumber should be consulted immediately if you experience the signs of a sewer line issue, including toilets that won’t flush or wastewater backing up into your sinks and showers. The best way to protect your home’s plumbing system is with preventive maintenance and good habits. This includes not flushing feminine hygiene products, diapers, or wipes down the toilet and not using harsh chemicals in your drains and pipes.
Your sewer lines are buried underground and subjected to many threats, such as tree roots and shifting soil. They’re also not immune to damage caused by age or wear and tear. Regardless of the type of pipe you have (cement, cast iron, clay), a variety of issues can cause damage and clogs.
The most common sign of a problem is water or sewage backups in your home, especially in the lowest rooms like basements and utility rooms. Another indicator is if your toilets are constantly running or making gurgling noises. Unlike regular drain line clogs, which are typically fixed by a plumber working inside your house, severe damage to a sewer line will require a crew of professionals digging up your entire yard to reach the damaged section and repair it.
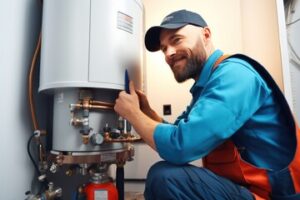
Your hot water heater is responsible for supplying warm or hot water to your bathtub, shower, washing machine, dishwasher and sinks. This device typically resembles a large metal tank that lives in a laundry room, utility closet or garage. It heats incoming cold water using either gas or electricity to keep a reservoir of hot water ready for use at all times. Most homes have a tank-style water heater that can hold between 20 and 80 gallons of water at a time.
The water is heated by a burner or element that sits at the bottom of the tank, and a thermostat that keeps the water at the same temperature, usually 120 to 140 degrees Fahrenheit. When a faucet is turned on, the dip tube takes cold water into the tank and sends it to the heating element. When the desired temperature is reached, it rises to the top of the tank where the hot water pipe takes it out.
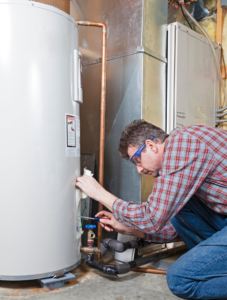
During its lifetime, a water heater can develop leaks that need repair. These leaks aren’t just a nuisance, they can lead to expensive water damage in your home and cause an environmental hazard as the leaking hot water may enter natural waterways or ecosystems and harm wildlife. A leaking water heater can also produce a rumbling sound that’s known as the death rattle. This sound is caused by the rapid expansion of a hot water tank, which can crack the unit or rupture the pressure relief valve.
A plumbing professional can diagnose the problem and determine if it is an issue with your home’s water pressure or your hot water heater. If the issue is due to a low supply of water pressure, your plumber can install a new water pressure regulator to increase the amount of pressure in your home’s pipes.